简体中文
简体中文
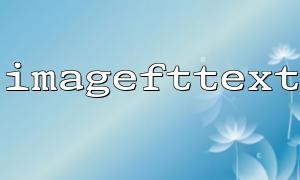
在使用PHP处理图像时,imagefttext 函数是一个非常实用的工具,它允许我们在图像上绘制支持 TrueType 字体的文本。除了普通文字绘制,我们还可以为文字添加阴影效果,从而增强视觉层次感和美观度。
本文将详细讲解如何使用 imagefttext 函数绘制带阴影的文字,并通过实际代码示例,帮助你快速掌握这一技巧。
首先,确保你的服务器环境已开启 GD 扩展,并且 PHP 支持 FreeType 字体库。此外,你需要准备一个 TTF 字体文件,例如常见的 arial.ttf。你可以从系统字体中复制,或下载喜欢的字体文件并存放于项目目录中。
imagefttext 的基本语法如下:
imagefttext(
    GdImage $image,
    float $size,
    float $angle,
    int $x,
    int $y,
    int $color,
    string $font_filename,
    string $text,
    array $options = []
): array
在不添加阴影的情况下绘制文字,代码可能如下所示:
$im = imagecreatetruecolor(400, 200);
$bg = imagecolorallocate($im, 255, 255, 255);
imagefilledrectangle($im, 0, 0, 400, 200, $bg);

$textColor = imagecolorallocate($im, 0, 0, 0);
$font = __DIR__ . '/arial.ttf';

imagefttext($im, 20, 0, 50, 100, $textColor, $font, 'Hello World');
绘制阴影的技巧是:先绘制阴影,再绘制主文字。通常阴影是略微偏移且颜色较深或透明度较低的同样文字。
以下是添加阴影效果的完整示例:
$im = imagecreatetruecolor(400, 200);
$white = imagecolorallocate($im, 255, 255, 255);
imagefilledrectangle($im, 0, 0, 400, 200, $white);

// 阴影颜色(灰色)
$shadowColor = imagecolorallocate($im, 100, 100, 100);
// 主文字颜色(黑色)
$textColor = imagecolorallocate($im, 0, 0, 0);

$font = __DIR__ . '/arial.ttf';
$text = 'Hello Shadow';

// 文字位置与大小
$fontSize = 24;
$angle = 0;
$x = 50;
$y = 100;

// 先绘制阴影(向右下偏移2px)
imagefttext($im, $fontSize, $angle, $x + 2, $y + 2, $shadowColor, $font, $text);

// 再绘制主文字
imagefttext($im, $fontSize, $angle, $x, $y, $textColor, $font, $text);

// 输出图片
header('Content-Type: image/png');
imagepng($im);
imagedestroy($im);
imagecolorallocate 用于定义主文字和阴影的颜色。
阴影通过文字位置微调实现,例如 (x+2, y+2)。
阴影颜色应低于主文字颜色亮度,也可以通过 imagecolorallocatealpha 设置透明度以获得更自然的阴影。
如果你想快速查看效果,可以将上述代码保存为 shadow-text.php 文件并上传到支持 PHP 的服务器中,例如:
https://gitbox.net/shadow-text.php
确保服务器有对应的字体文件(如 arial.ttf)在相同目录下,否则会出现字体加载失败的问题。
通过简单的坐标偏移和合理配色,我们就可以用 imagefttext 实现令人满意的文字阴影效果。这种技巧广泛应用于验证码生成、水印绘制以及个性化图像输出中。善用 GD 库,可以大大提升你的图像处理能力。
在今后的项目中,不妨多尝试文字样式的变化,比如叠加模糊阴影、多层投影、描边效果等,进一步美化输出图像。